Create Verifier Template
A verifier template (shown as Receive credential configuration in the UI) defines which credentials you want to receive from a customer in a single verification flow. You can create a different template for each use case.
Assume you want to onboard a new customer. For your Know Your Customer (KYC) use case, you need to receive credentials to prove:
- The Deed of Incorporation of the customer
- The LPID of the customer
- The Tax Registration Statement of the customer
Open the verifier templates list
- Go to Settings → Templates (under Verifier).
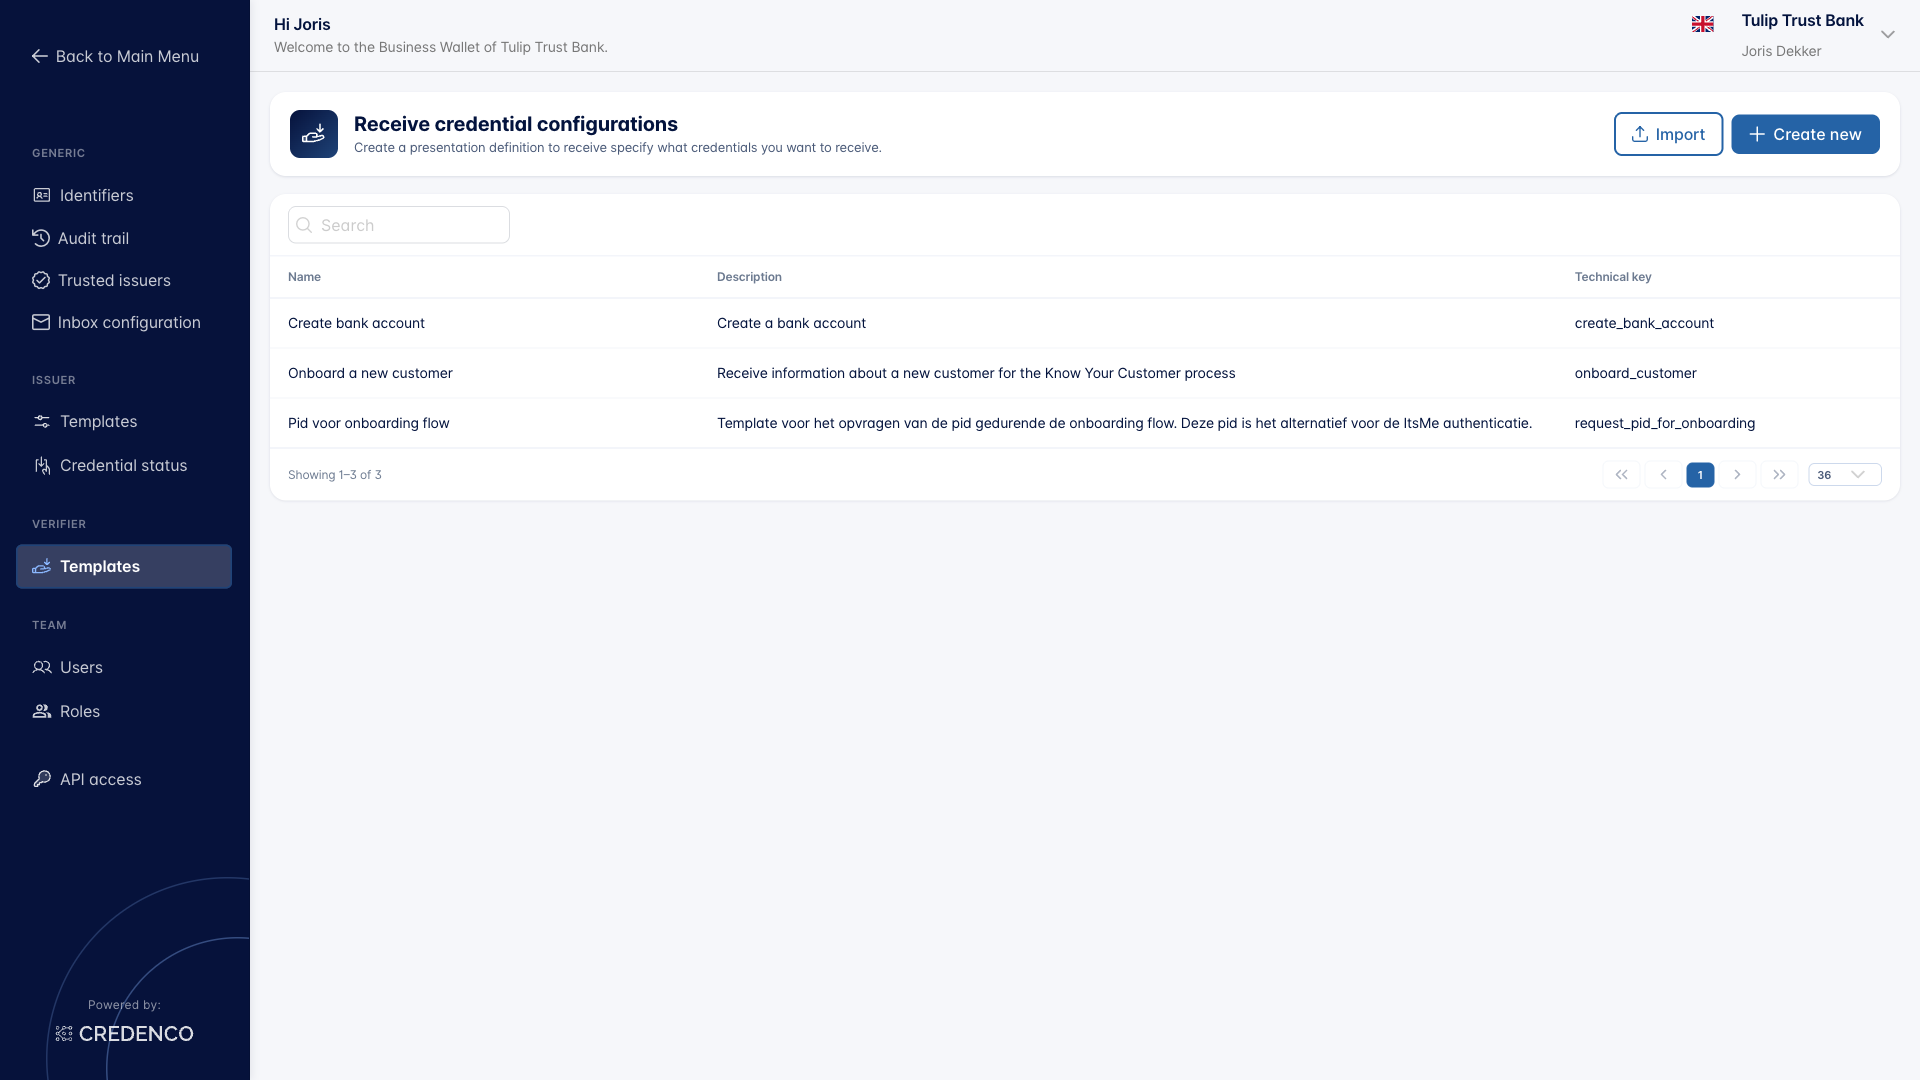
The table lists the existing templates with their Name, Description, and Technical key. From here you can:
- Create new — start from a blank template
- Import — import a verifier template that was previously exported
Click a row to open and edit an existing template.
Verifier template form
A verifier template is grouped into three sections.
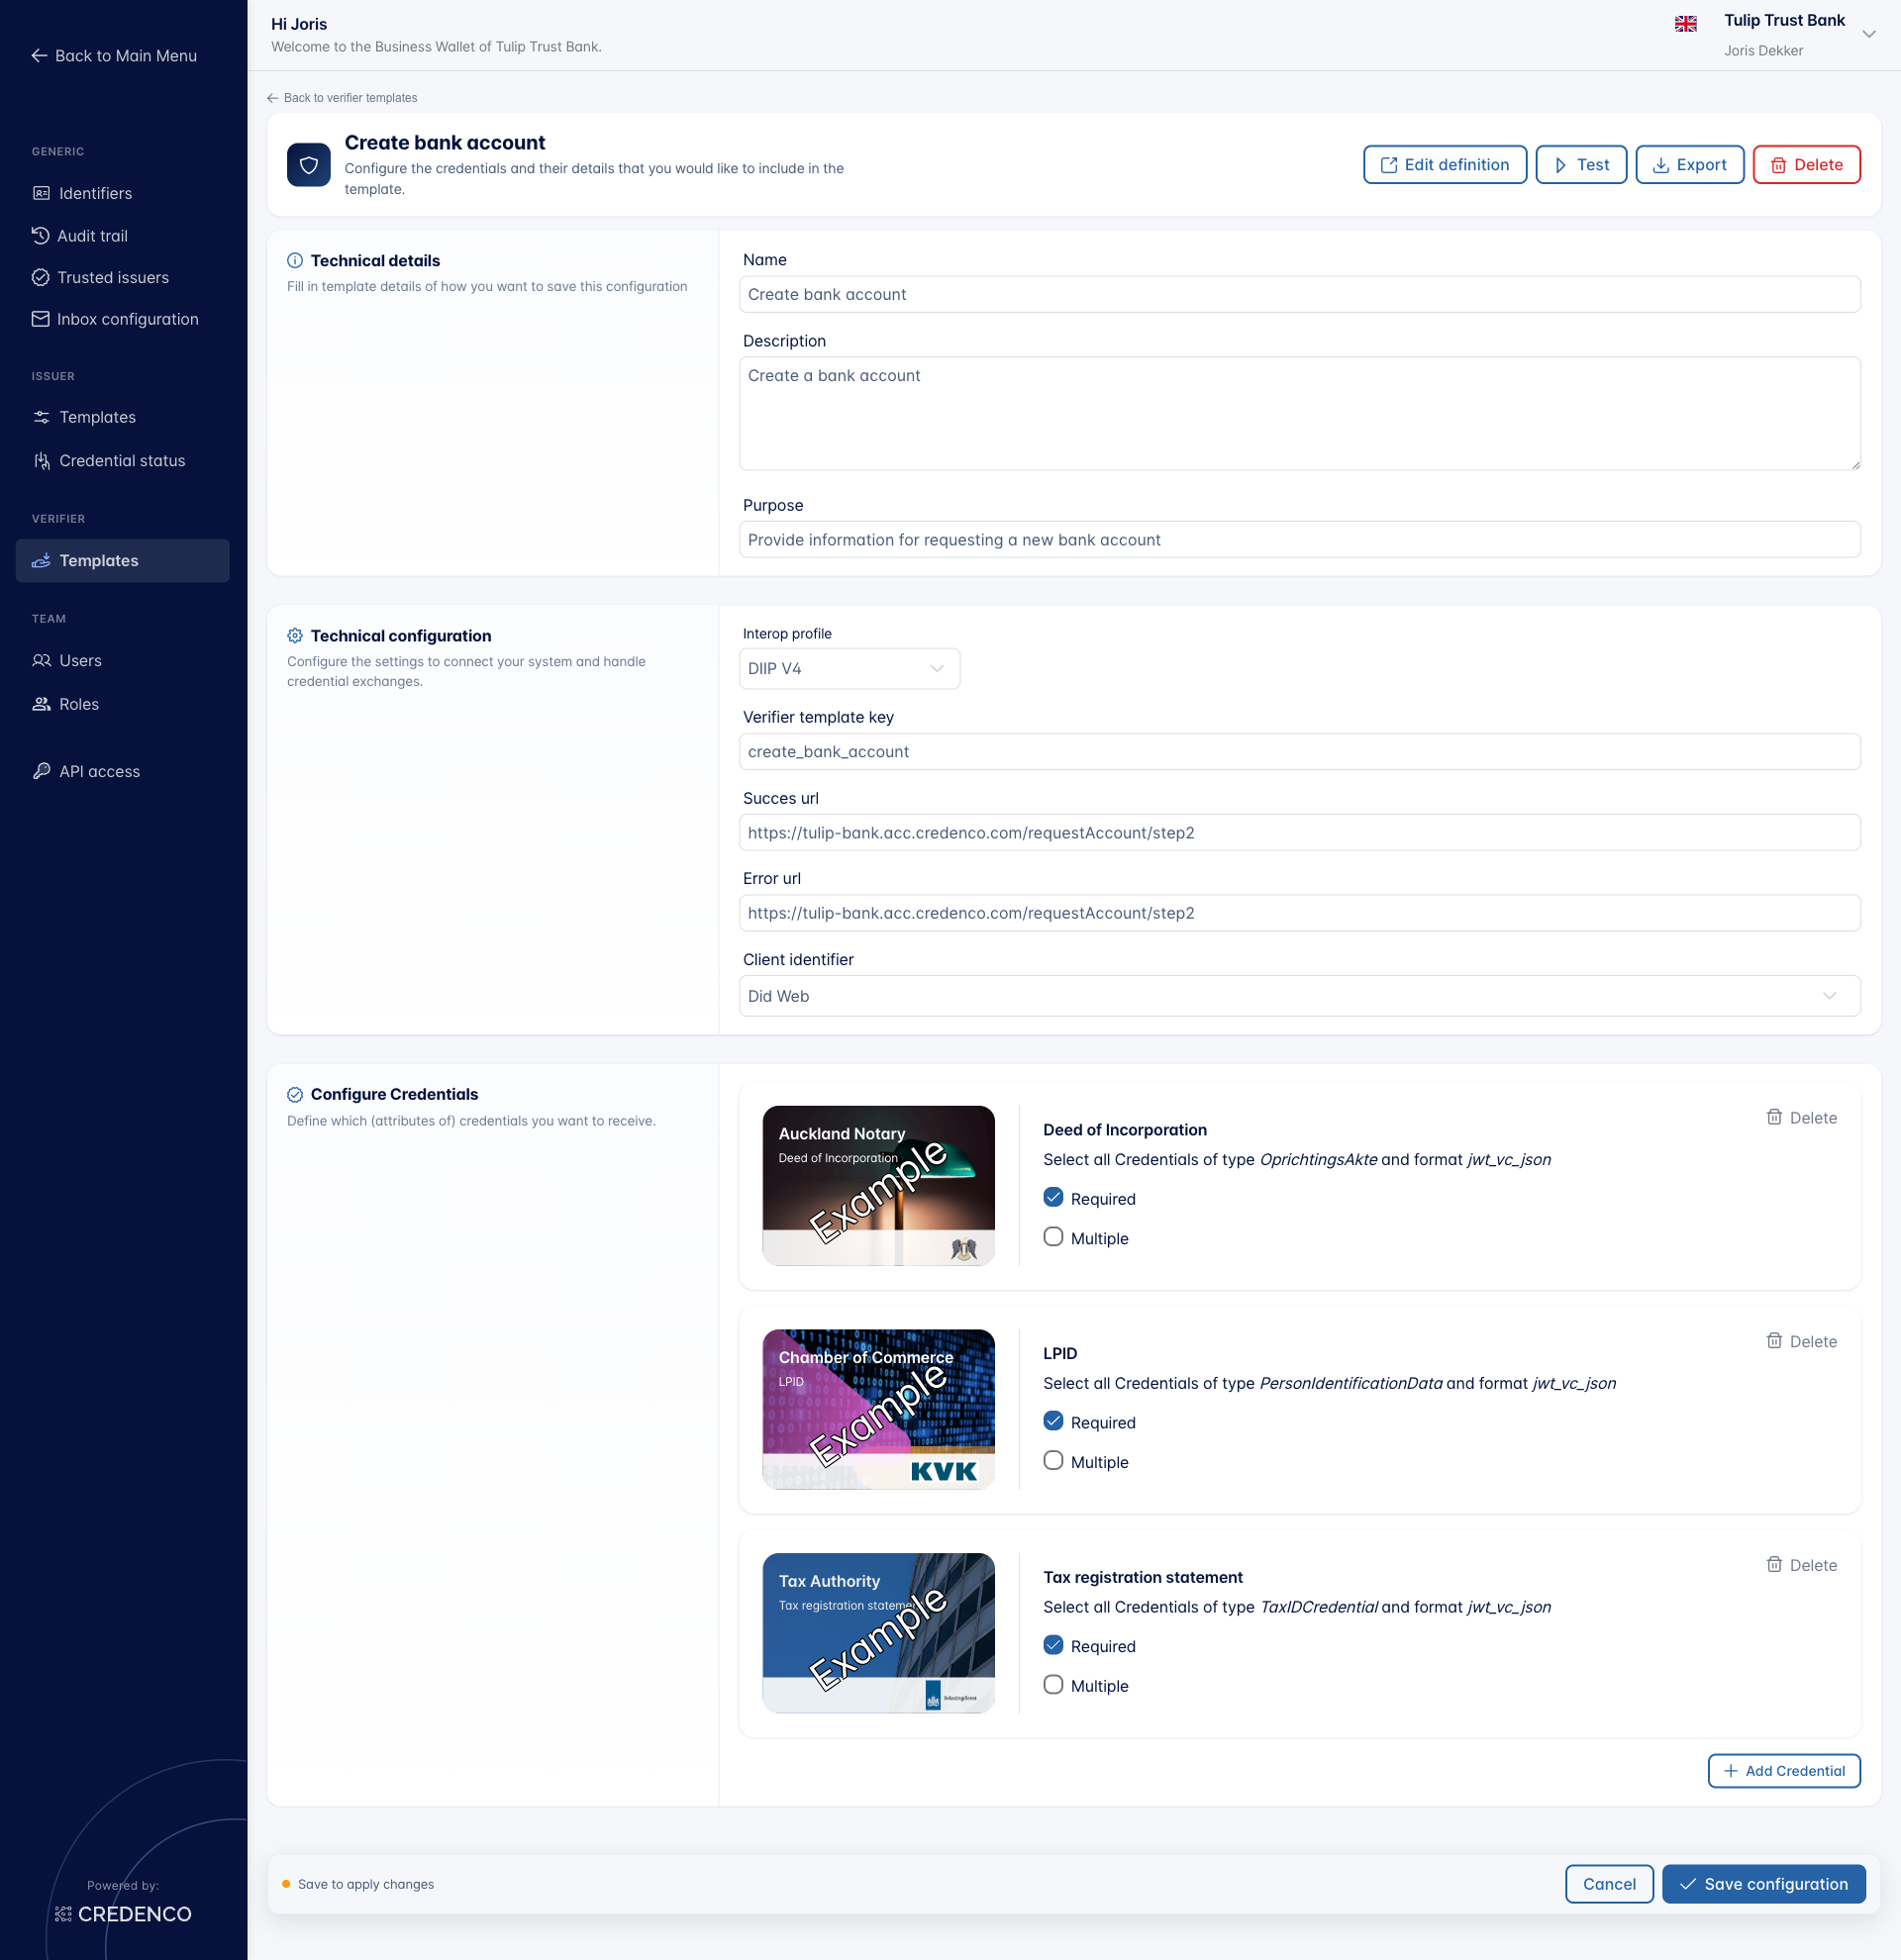
The top-right actions let you Edit definition (open the raw presentation definition JSON), Test the template, Export it to JSON, or Delete it.
Technical details
Describe what this template is for. These fields are only used in the UI and in the consent screen shown to the wallet user.
- Name (required) — A logical name of the configuration.
- Description — A short description that helps you find the template later.
- Purpose (required) — The text shown to the wallet user explaining why you are asking for the credential(s).
Technical configuration
Configure the protocol details used during the credential exchange.
-
Interop profile (required) — The interoperability profile that defines the protocol versions used between the verifier and the wallet. Pick from:
DIIP V3DIIP V4DIIP V5HAIP
See the DIIP specification for details on the DIIP profiles, or the OpenID4VC High Assurance Interoperability Profile for HAIP.
-
Verifier template key (required) — A unique key for this template. Pass this key to the Universal OIDC4VP API to identify which template to use.
-
Success URL (required) — The URL the user is navigated to after the credential(s) are successfully received.
-
Error URL (required) — The URL the user is navigated to when something went wrong receiving the credential(s).
-
Client identifier (required) — The client identifier used to authenticate the verifier to the wallet. Pick one of the identifiers configured under Settings → Identifiers.
Configure credentials
The Configure Credentials section lists every credential the template requests. Click Add Credential to add one.
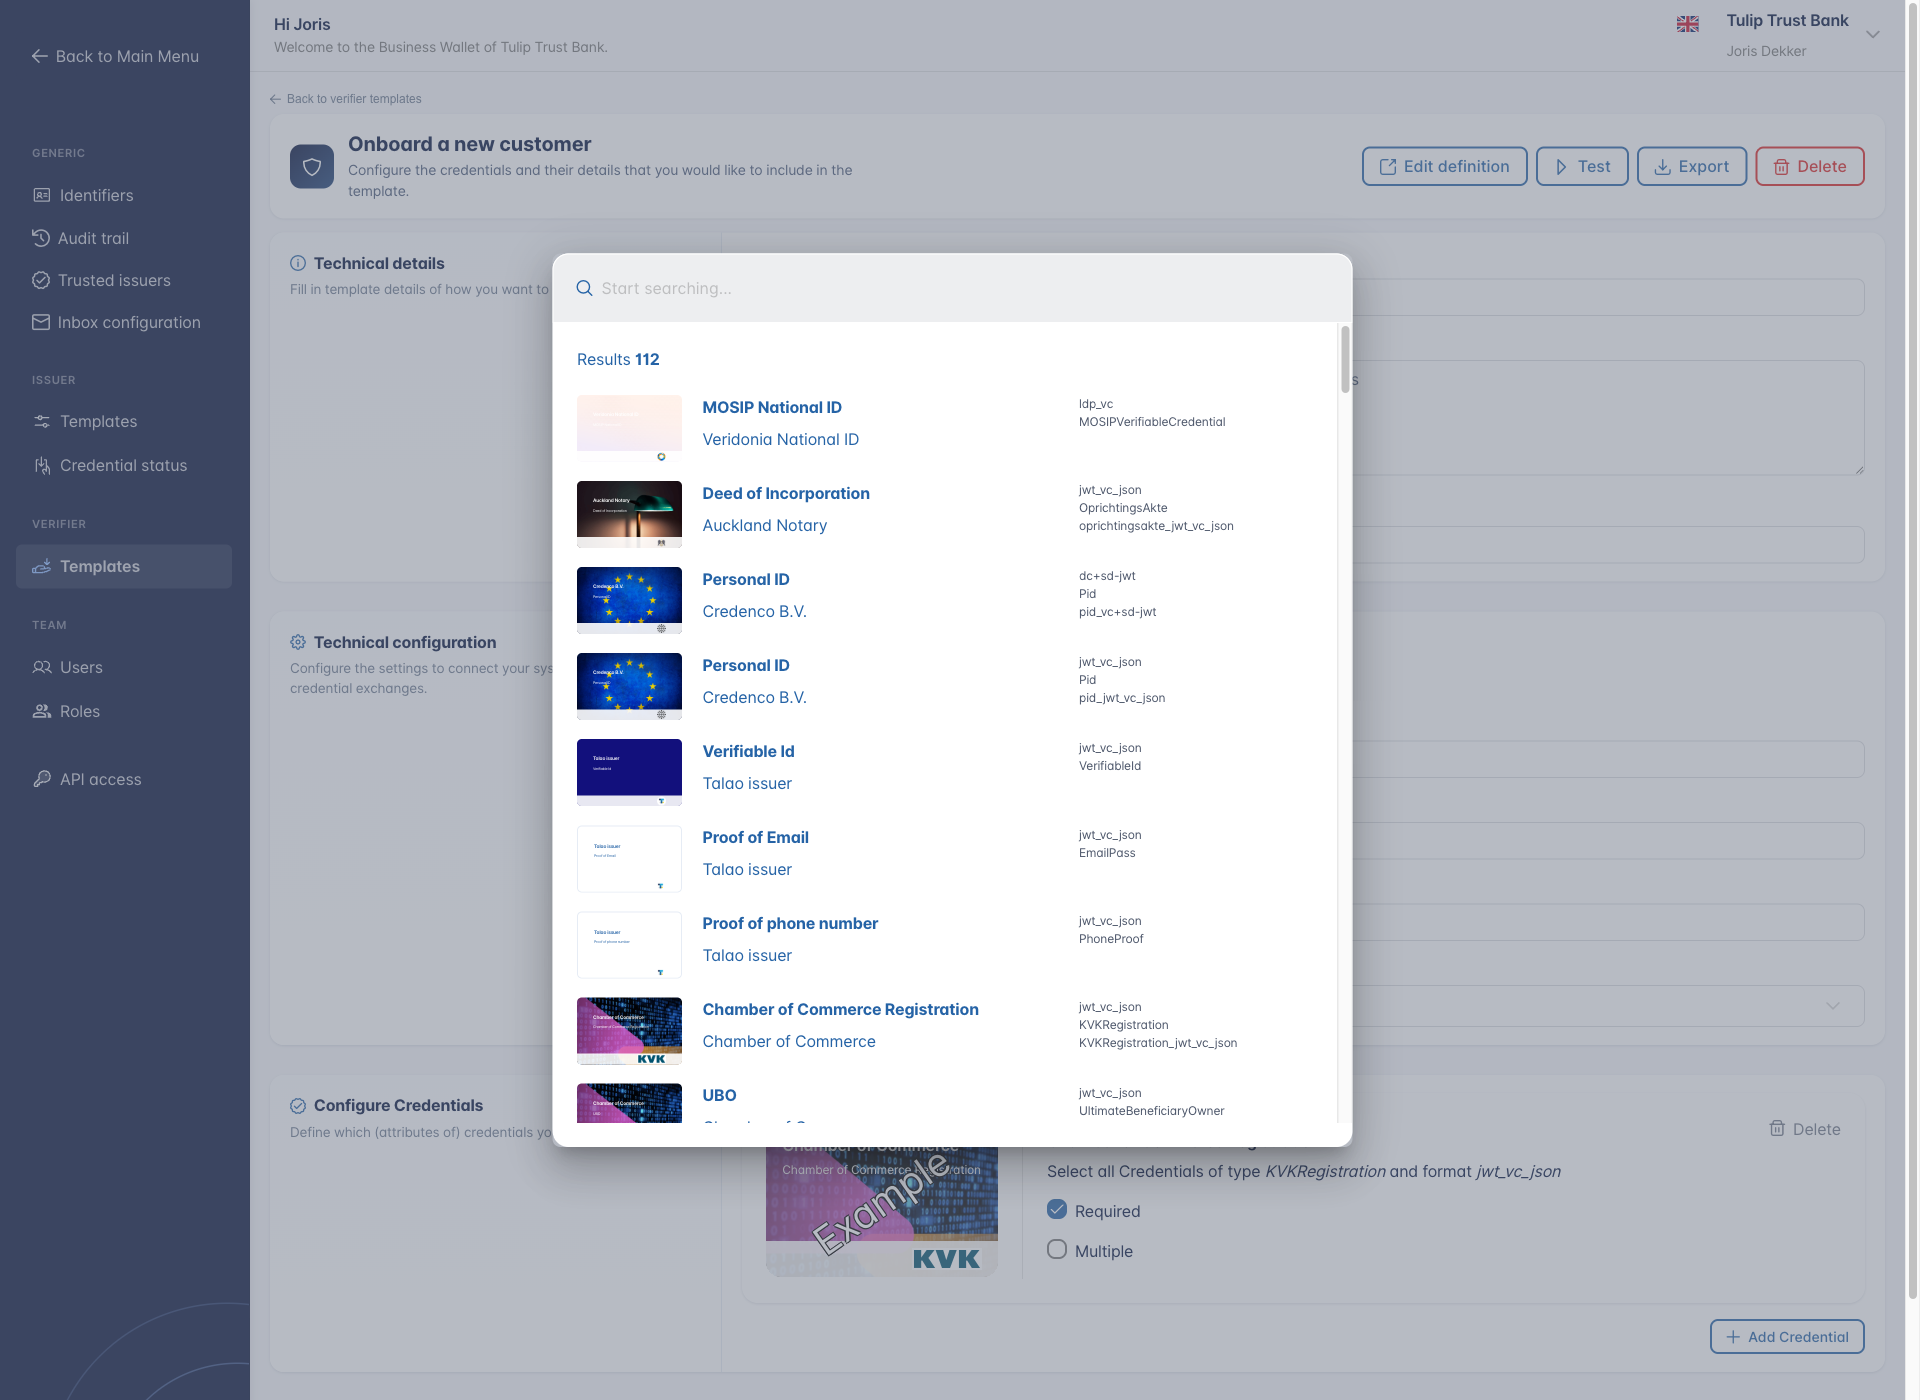
Pick a credential from the catalogue. For each credential you add you can configure:
- Required — Whether the customer must provide a credential of this type.
- Multiple — Whether the customer may provide multiple credentials of this type (for example, multiple
Diplomacredentials). - Requested attributes — For credential formats that support selective disclosure, pick which attributes you want to receive. Attributes not selected may still be provided but are optional.
Use the Delete button on a credential card to remove it from the template.
Save
Click Save configuration at the bottom of the form to apply your changes, or Cancel to discard them. A "Save to apply changes" hint appears when you have unsaved edits.
You need the Verifier templates (Change) permission to create, edit, or delete verifier templates.