API key
API keys are an alternative to OAuth clients for granting external systems access to your wallet. Each key has a name, a set of permissions, and an expiry date — so you can grant different integrating parties exactly the access they need, for as long as they need it.
Unlike OAuth clients, API keys use a simple Bearer token scheme and do not require an OAuth token exchange step.
What you can do
- Add an API key to grant an external system access to your wallet
- Edit an API key to update its permissions or expiry date
- Delete an API key to revoke access
Navigate to API keys
Go to Settings → API access and open the API key API access tab.
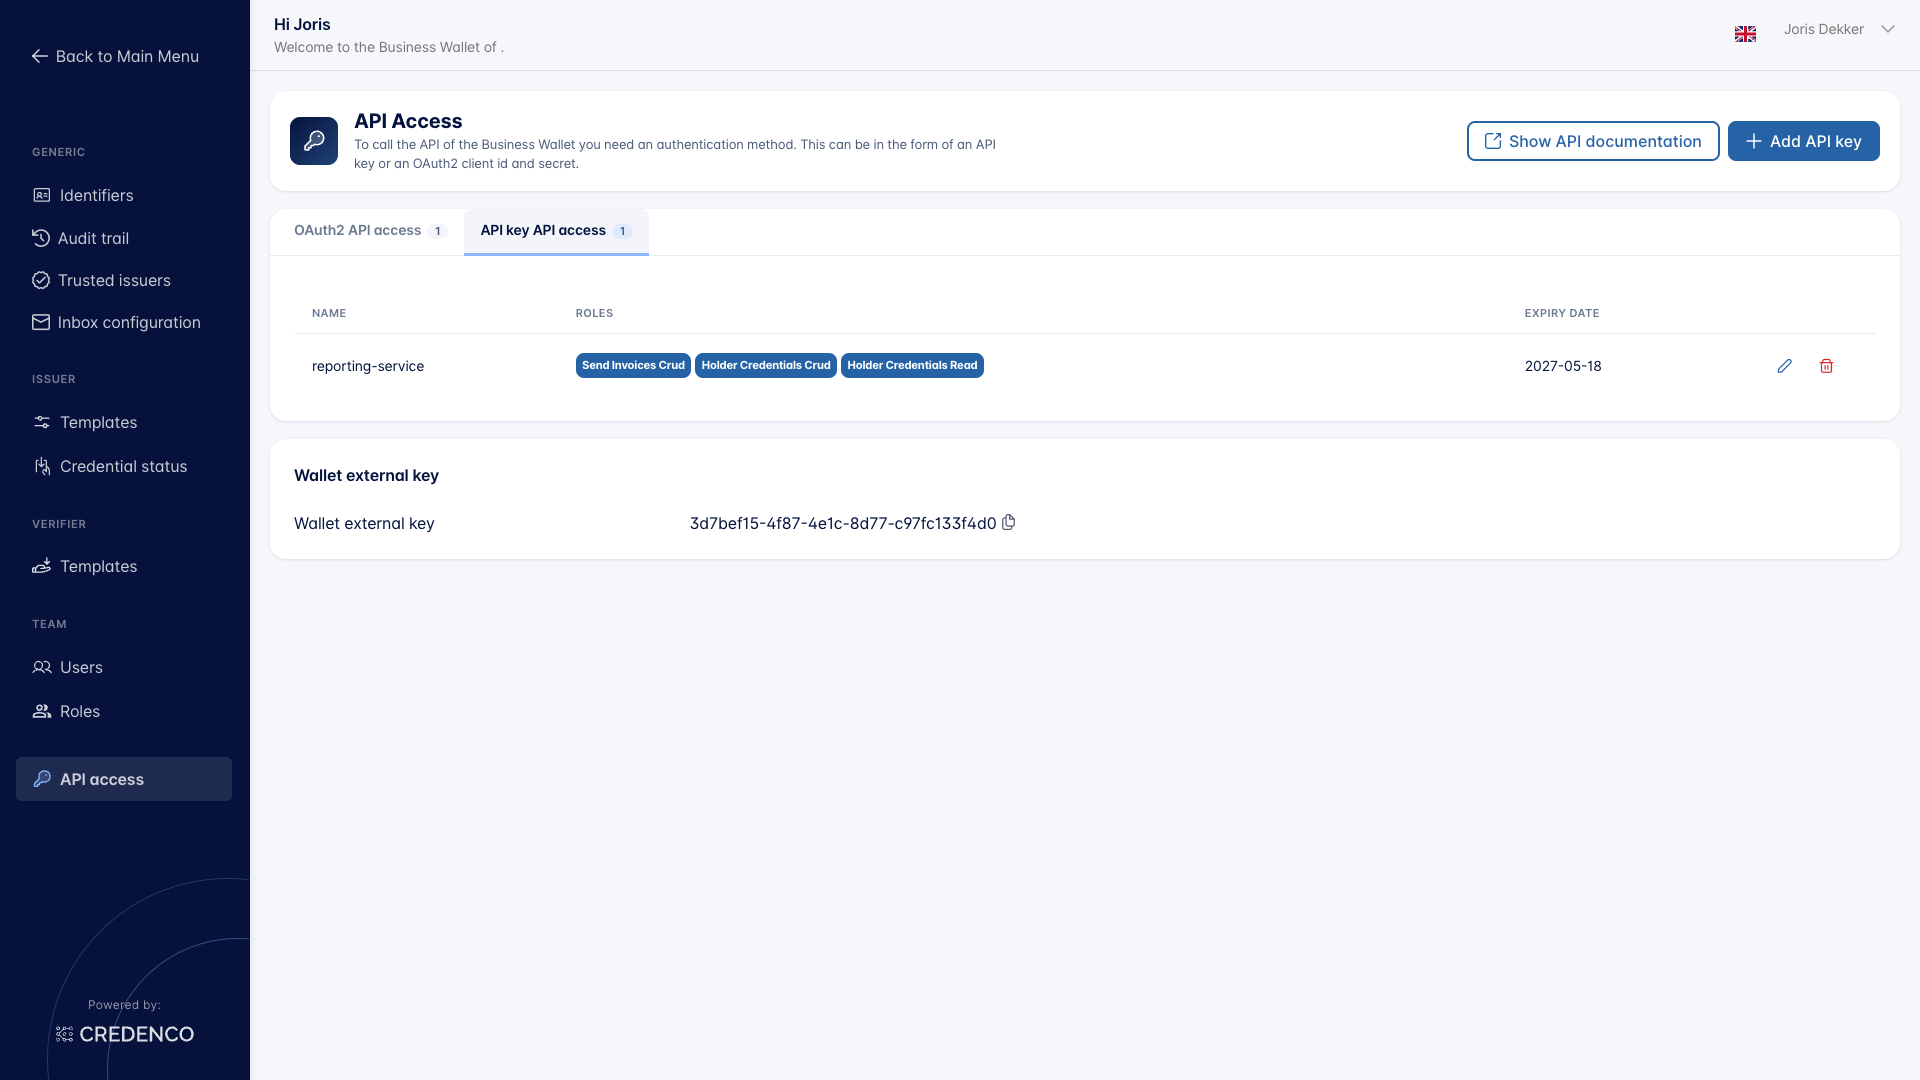
The table lists all configured API keys. Each row shows:
| Column | Description |
|---|---|
| Name | The name given to this API key |
| Roles | The permissions assigned to this key |
| Expiry date | The date after which this key is rejected |
Expired API keys are visually greyed out and flagged with a warning icon.
You need the API access (View) permission to view this screen, and API access (Change) to add, edit, or delete API keys.
Add an API key
Click Add API key in the top right of the screen. The Add API key dialog opens.
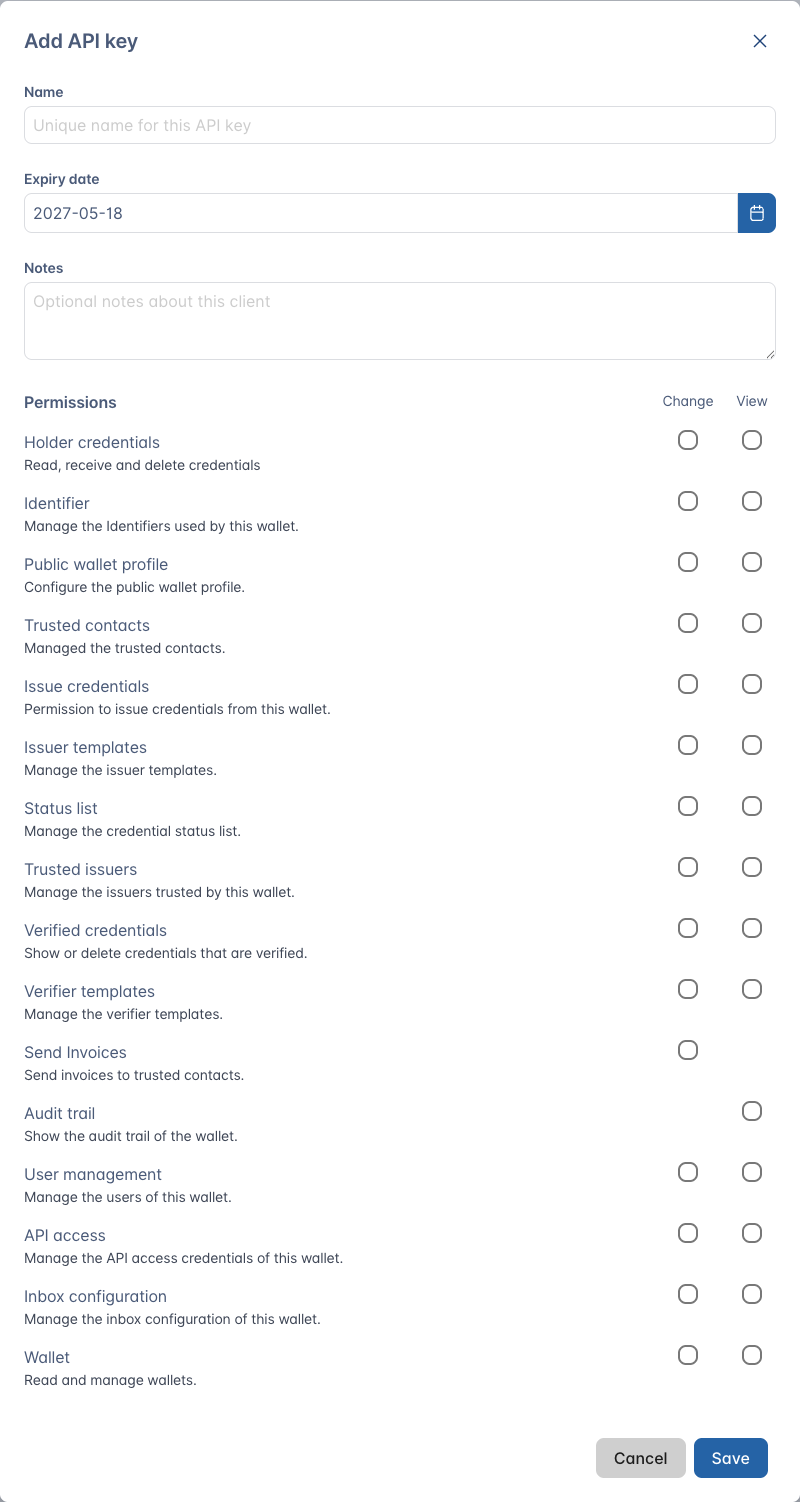
Fill in the fields:
Name (required)
A name for this key. Choose something meaningful, such as the name of the integrating party or its purpose (e.g. acme-backend or reporting-service). This value cannot be changed after creation.
Expiry date (required) The date on which this key expires. Defaults to one year from today. After the expiry date, the key is rejected.
Notes (optional) Free-text field to record context about the key, such as the integrating party's name, contact person, or purpose.
Permissions Select which permissions to assign to this key using the permissions grid. Each row represents a resource (such as Holder credentials, Identifier, Trusted contacts, Issue credentials, API access, Wallet, …) and has two checkboxes:
- Change — grants full create/read/update/delete access for the resource (and implicitly selects View)
- View — grants read-only access; can be selected independently
A few resources only have a Change column (for example Send Invoices and Audit trail) because read-only access is not meaningful for them.
Click Save. A dialog appears showing the generated API key value.
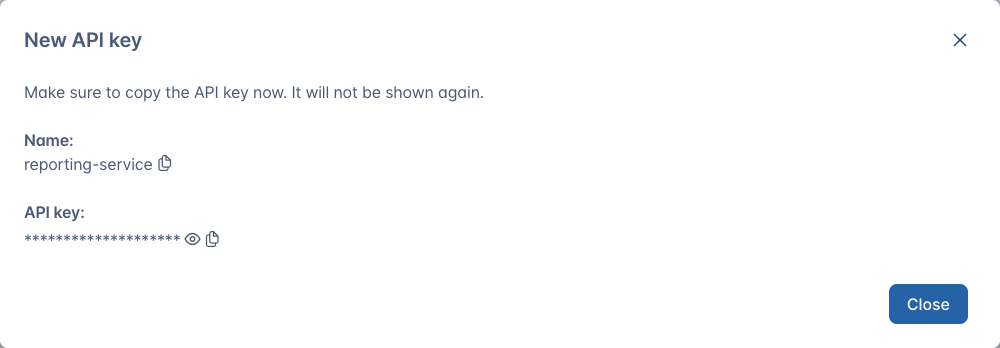
The API key value is only shown once. Store it securely — it cannot be retrieved afterwards.
The new API key now appears in the list.
Edit an API key
Click the pencil icon on any row to edit an API key.
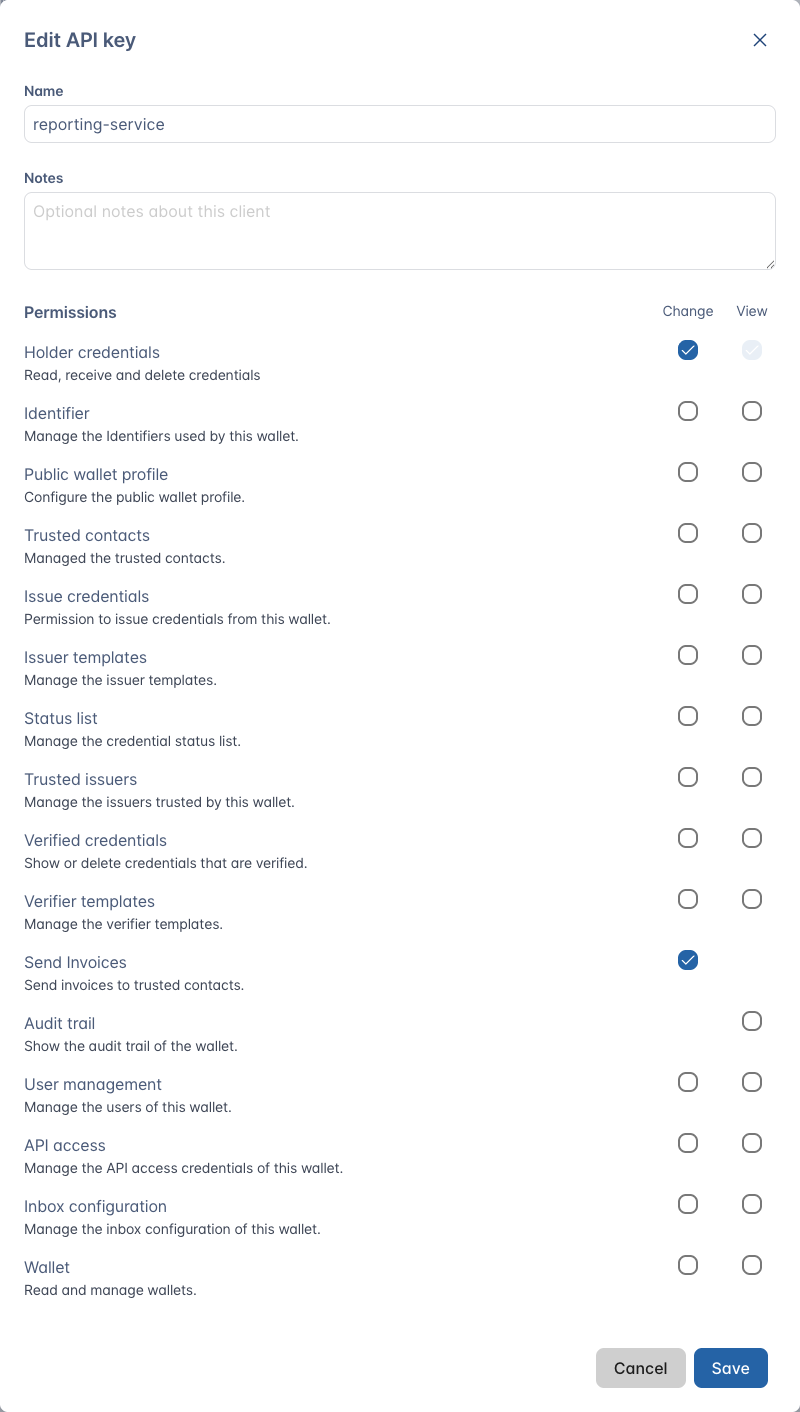
You can update the expiry date, notes, and permissions. The name cannot be changed.
Click Save to apply the changes.
Delete an API key
Click the trash icon on any row. A confirmation dialog appears.
Click Yes to permanently revoke access for this API key.
Authenticate using an API key
Pass the API key value in the x-api-key header of your API requests:
GET /api/...
x-api-key: {your-api-key-value}